
Would you like to configure WooCommerce per product shipping? If you are looking for a simple guide, keep reading this article. Here is the step-by-step guide to configure it for your WooCommerce store.
Creating an online store is easy. Anyone with technical knowledge can launch their first website without hassle with WordPress and the WooCommerce plugin.
But do you know you can set up custom shipping charges per product?
WooCommerce doesn’t come with this feature by default. However, you can add it with some extensions. If you are wondering how to do it, keep reading this article.
Here is how to configure WooCommerce per product shipping on your WooCommerce site.
First, let’s see why you must configure WooCommerce per product shipping.
Why You Need to Configure WooCommerce Per Product Shipping?
Shipping charges are one of the primary concerns you must focus on while running an online store with physical products. If you ship products worldwide, setting up a flat fee per order will not be feasible.
Similarly, if you run an electronics store, the shipping charges to deliver a television would be higher than for a simple charger. The size, weight, and shipping region matter the most.
So, you should add a custom shipping fee according to the product you deliver.
That’s when custom WooCommerce per-product shipping will come in handy. This feature allows you to configure custom shipping rates per product or category.
This way, your profit won’t be affected. Now you know why you should add custom WooCommerce per-product shipping to your store. The following section will show you how to complete the task.
How to Configure WooComerce Per Product Shipping?
You have multiple plugins to configure this option. Some of the popular plugins are:
And so on.
For this tutorial, we will use the YayPricing and YayExtra plugins. The first thing you need to do is install and activate these plugins on your website.
YayPricing and YayExtra are freemium tools. The lite version of the plugin can be downloaded from the WordPress plugins repository.
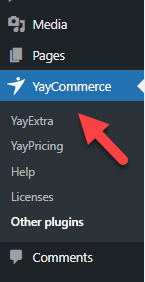
For this tutorial, we will use the premium version of both plugins. After activation, you can see the plugin’s settings in the YayCommerce section.
Let’s take a closer look at the customizations of both plugins.
1. YayExtra Customization
If customers want the product quickly, they could opt for priority shipping. Most e-commerce stores nowadays offer priority shipping for an additional cost.
Rather than sending the product in 5 or 6 days, priority shipping will help other customers get the product in between 2 and 3 days.
This feature can be achieved with the help of YayExtra. After activating the plugin, you need to create a new option set.
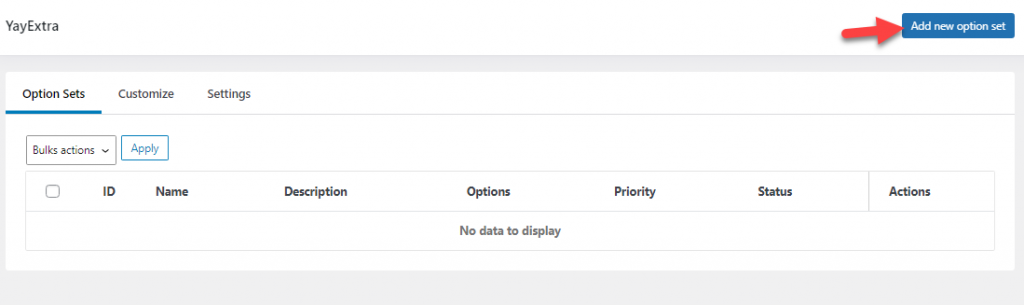
Now, you can give the option a name and a description.

Once you have configured that, add new options to the set.
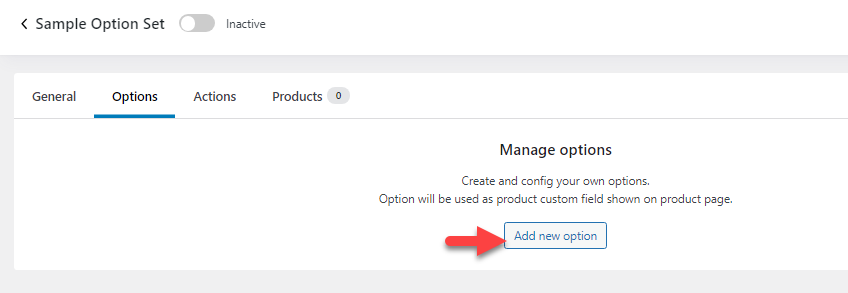
Next, choose the label for the option and type. We will label it as Priority Shipping, and the type will be a radio button.

Now, add the option values. In this case, we have added yes and no as the values.
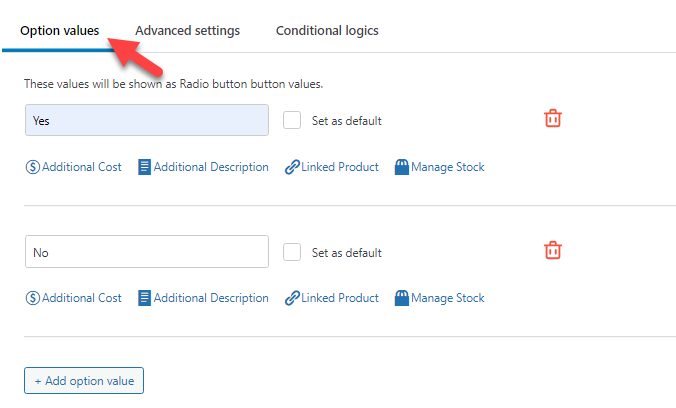
If you check the option value field, you can see a slot to add additional cost to the order.
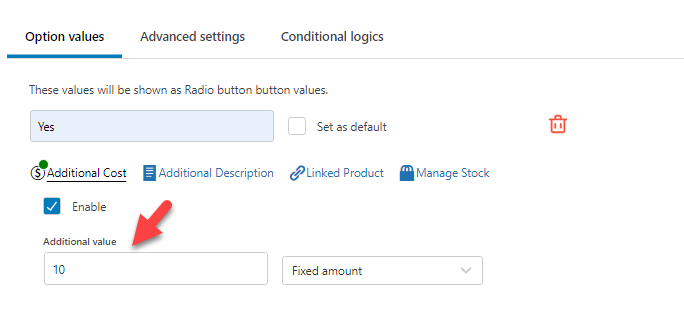
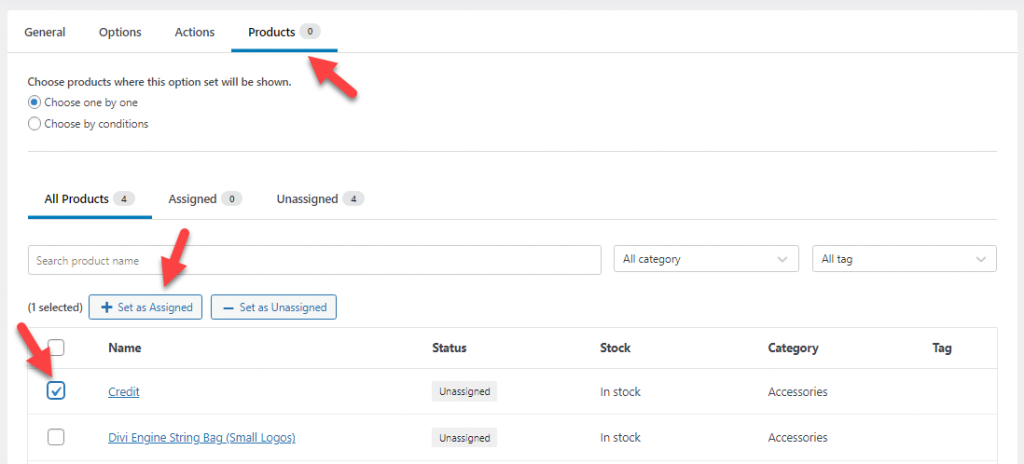
We have enabled it and added $10 as the extra fee. Next, go to the products section and add the product you need to apply this rule.
You can either choose products one by one or select the products according to conditions.
After that, you must activate the options set and save the changes.

Check the product from the front end. Inside the product page, you will see the new radio button.

If the customer selects priority shipping, an extra $120 will be added to the total order value.
This way, you can add extra shipping to custom products. Via the YayExtra settings, you can create as many option sets as you need and ask for additional shipping charges.
This strategy will not affect your profit margins and is good to follow. The next section will show you how to use YayPricing to add extra shipping charges to your customer orders.
2. YayPricing Customization
If you need to add dynamic pricing to your WooCommerce store, YayPricing is the best option. If you open the plugin’s settings, you will see options like this:

As you can see in the screenshot, you can add multiple fees/discounts to the plugin. For example, you can tweak
- Product pricing
- Cart discount
- Checkout pricing
And so on.
Since we aim to add a custom shipping rate to custom products, you must add one rule to the checkout fee option.
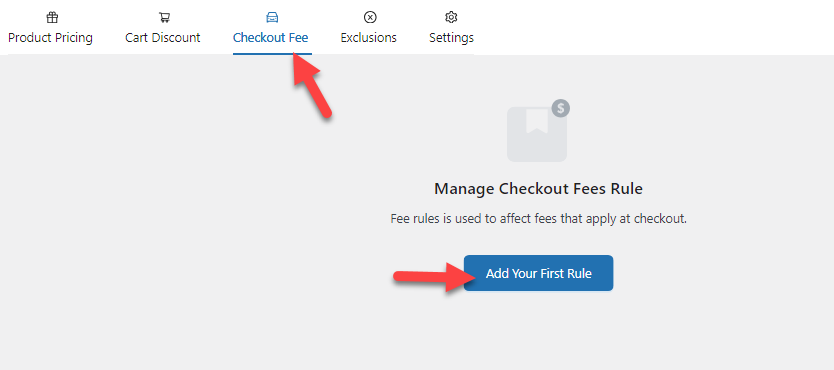
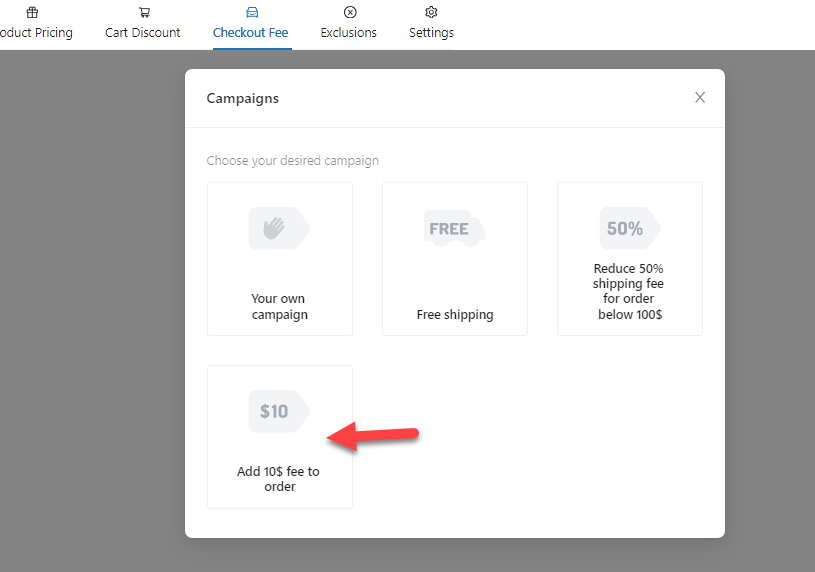
You can choose the fourth available campaign, adding an extra fee to the total order.
Now, you can start customizing the rule.
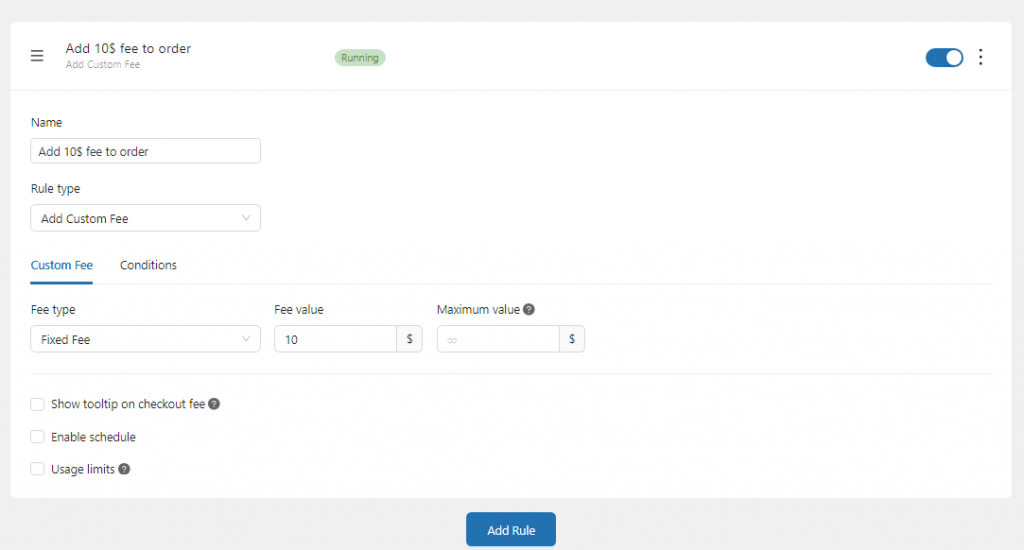
The first thing you can do is name the rule. The name won’t be visible to your website visitors. When you have created multiple rules under the plugin, this will help you with identification.
After adding the name, choose how much you need to charge extra for the order.
The plugin charges a $10 flat fee for shipping by default. However, you can always modify the amount in the settings.

You can also show the tooltip on the checkout page so there won’t be any confusion.

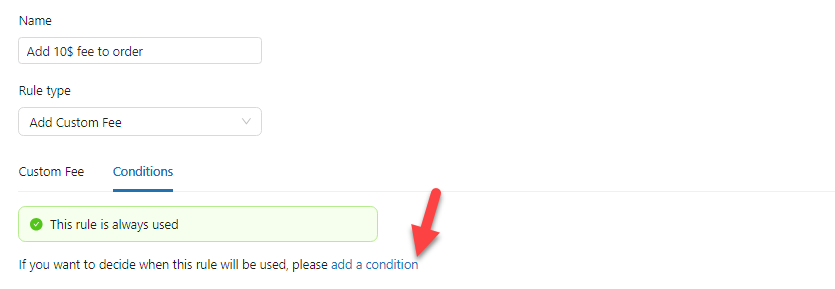
If you save this rule, it will be applied to all the products. Since we need to specify the products, go to the conditions and add a new condition.
As we did before, the condition type we will use is cart items.
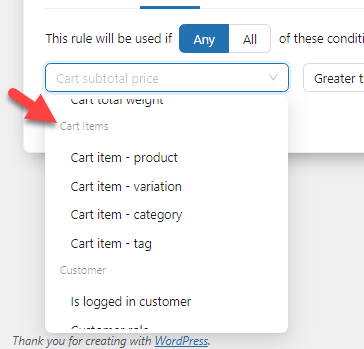
You can either assign this rule to a specific product or a category. We recommend creating multiple rules for custom categories. For example, if you sell cellphone chargers and they are assigned under a category called chargers, you can set a $10 shipping fee.
When you sell something big like a TV or a Fridge, you should add $100 to $200 for shipping the product (based on your margins).
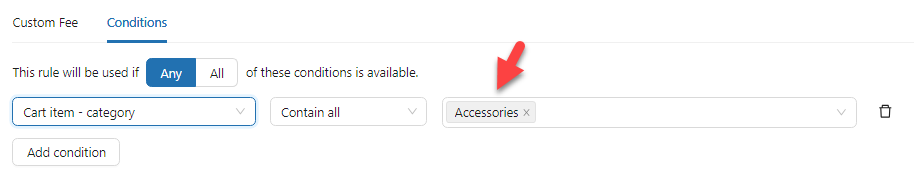
Here, we will add this fee to a WooCommerce product category called Accessories.
Once you have completed the customization, you can save the rule. Remember that you can add multiple rules to the website and charge extra shipping per product or category.
YayPricing won’t limit you to the number of rules you can have. Now, let’s check the customizations from the front end. Here, we have added a product from the accessories archive to the cart, and on the checkout page, WooCommerce charged an extra $10 for shipping.
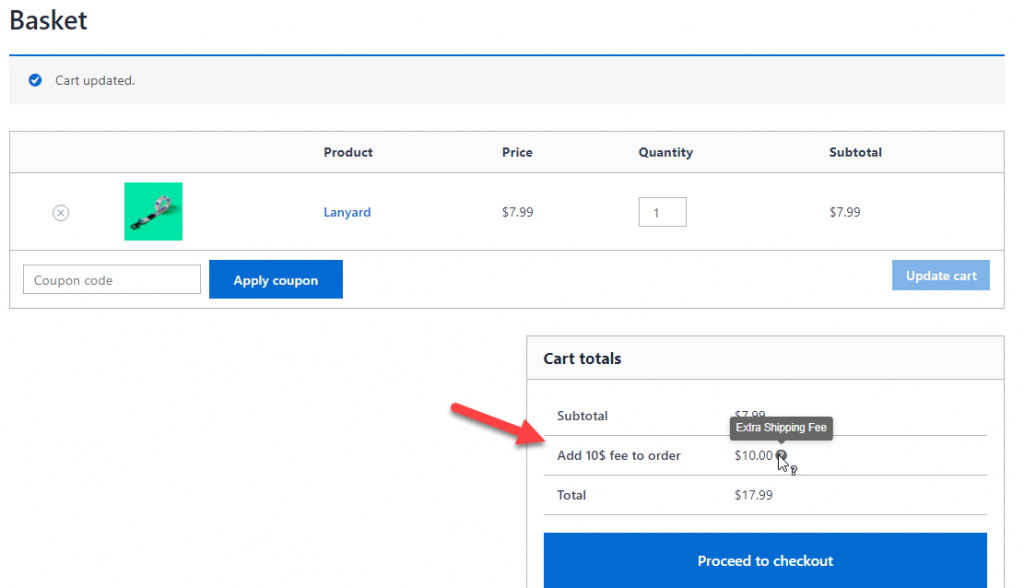
This way, you can add custom WooCommerce per product shipped to your store.
Conclusion
Since WooCommerce stores are customer-centric, you must improve the customer experience. A better customer experience will help you achieve better conversions.
In this article, we have shown you the perfect method you can use to configure WooCommerce per product shipping. As you can see, YayCommerce plugins will make the job easier for you.
Without touching a single line of code, you can set up WooCommerce per product shipping.
Would you configure WooCommerce per product shipping?
Let us know in the comments.
If you want a good theme for WooCommerce, check out our Shoptimizer review.
Leave a Reply